

Injection molding is a complex process of manufacturing high-quality plastic parts. It includes various sub-processes that comprises injection molding materials, tools and molds, and molding machines. All these sub-processes need to be optimal and if they are not, each one of them is a potential risk for flaws and defects in the injection molded part.
One of the defects that is commonly observed in the injection molding industry is a ‘Flash’. It’s an unintended extra layer of plastic that forms in the part. Relative to other defects, it is easy to remove a flash but it demands extra efforts and resources. In addition, it also affects and damages the mold. Thus, it is imperative to control and minimize the formation of flash in injection molding projects. In this article, we discuss the causes and reasons of flash and how injection molders fix flashing.
A flash defect is a type of flaw in which excess plastic remains on the parting line of the part’s surface. The extra plastic is unwanted plastic and is typically forced out, at the parting line of the mold cavity. This extra plastic however; continues to emerge from other locations and when this happens, it creates the flash defect in injection molding.
The flash defect in injection molding usually occurs at the parting surface, where the melt flows in and forms a superfluous edge burr on the part. It typically occurs between the moving mold and either the static mold, the insert gap, or sliding section of the sliding block.
These areas are simply to name a few, but basically this defect in injection molding can occur anywhere, where there is a boundary or there is a scope of excess melt accumulation on the parting line, or any other area where different shapes come together in the mold. Irrespective of the location, the causes and effects of the flash defect continue to have similar impact on the part.
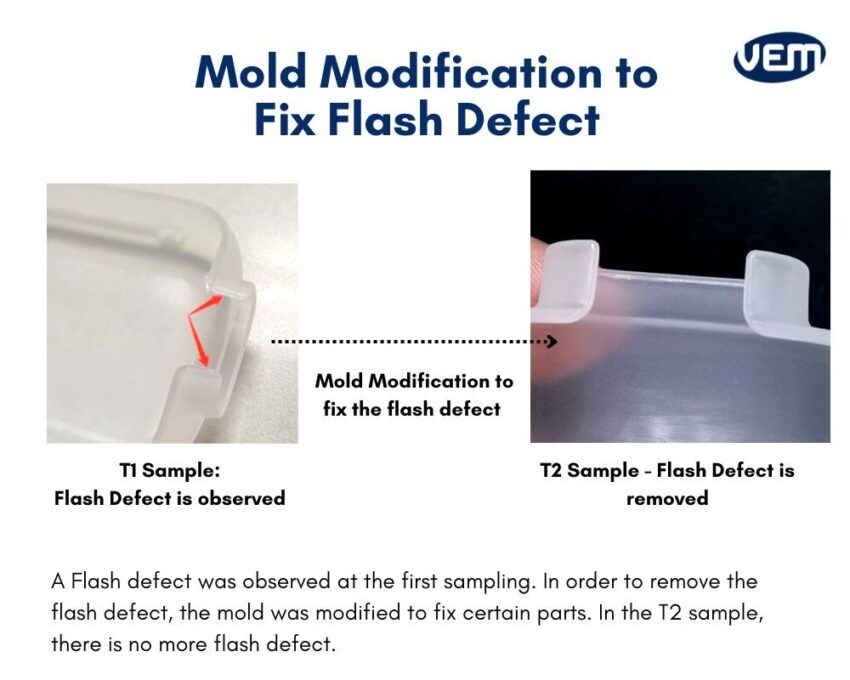
The following diagram illustrates mold modification to fix flash defect at VEM-Tooling:
In injection molding, the flash defect is also referred to as injection mold flash, mold flashing, or burrs and you should note that, all of these terms are used interchangeably.
As the melt escapes the mold cavity, it solidifies outside during injection which leads to aesthetically displeasing results. At times, it might even render the part as non-functional. This type of defect not only decreases the quality of the part but it also damages the mold. Thus, it is pressing to understand its right fixes, and prevention techniques. Let’s take a look at some of the most effective ways that can help you control the occurrence of flash in your molded parts:
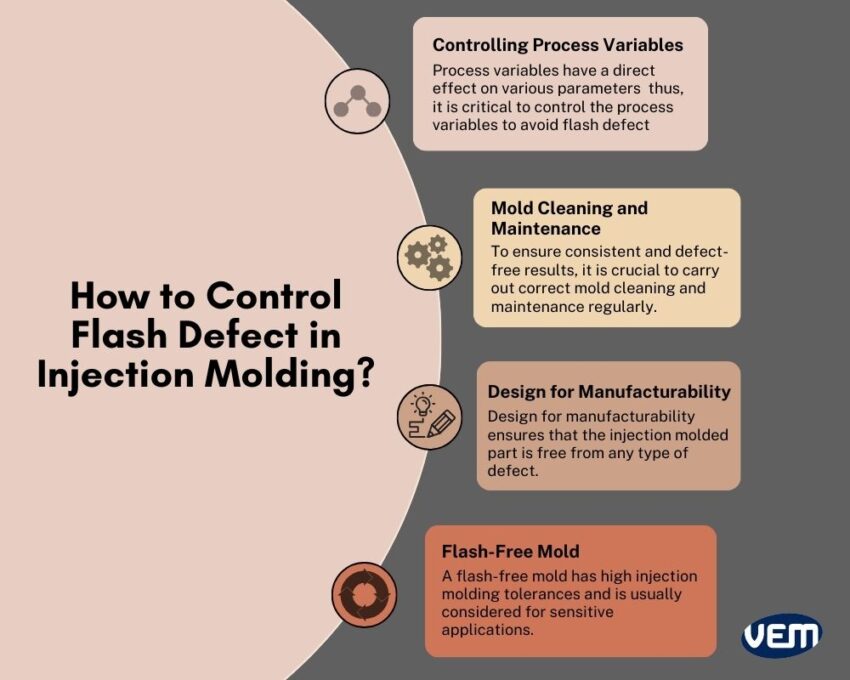
Design for manufacturability, abbreviated as DfM is one of the simplest and effective approaches to ensuring that your injection molded part is free from any type of defect, including the flash defect. Today, DfM analysis plays an integral role in effectively demonstrating the flow characteristics via simulating the results and predicting common injection molding defects.
DfM prioritizes function over intricate systems. For instance: It is recommended to incorporate the parting line on the edge rather than the surface as the parting line won’t be visible on the edge and the seam would counter any parting line mismatch which reduces the chances of flash. DfM prioritizes such designs, to ensure both aesthetic and functional benefits.
DfM is a set of design rules that can guide you with various parameters such as ideal wall thickness, gate, hole and parting line design to manufacture a defect-free part. This is especially helpful in prototype injection molding.
In order to ensure and eliminate the flash defect from your injection molded parts, it is recommended that you specify a flash-free mold. It is an expensive approach but guarantees the best results.
A flash-free mold is usually implemented for very high-quality product runs and is a viable option if the quantity is high. In such cases, it’s better to invest in a flash-free mold so that there are no flash occurrences in the part. If the production numbers aren’t very high, then it’s more cost-efficient to cut the flash manually.
A flash-free mold has high injection molding tolerances and is thus, also considered for sensitive applications where any part of aesthetics, and functionality cannot be compromised upon. In such cases, where cost is not an issue, but quality is, a flash-free mold is the best way to ensure a flash free part!
To ensure consistent and defect-free results, it is crucial to carry out correct mold cleaning and maintenance regularly. For instance: Accumulation of dirt and contaminants is one of the major causes of parting line mismatch which leads to the flash defect in your injection molded part. Additionally microparticles in narrow mold cavities cause overpacking, which further increases the scope of introducing other defects in the part. Thus, it is crucial to clean and maintain molds.
In order to clean the mold, you can use a mold cleanser, and compressed air to clean the mold surface. You should ensure to remove any type of dust or plastic from the mold and furthermore, you should examine the mold for fragments behind the slides and in the leader pins’ pockets.
Process variables such as the injection rate have a direct effect on various parameters i.e. the viscosity, pressure, and temperature thus, it is critical to control the process variables optimally to avoid the flash defect. You should note that if these process variables are not controlled, they can also damage the mold which increases the chances of multiple defects in the part.
Flash defects in injection molding can be caused during the injection phase or due to flow characteristics or during packing. The most common reason is a parting line mismatch during the injection phase but apart from this particular cause, there are a plethora of reasons that can cause injection molding flash in your part. Let’s take a look at the various causes of flash defect in injection molding:

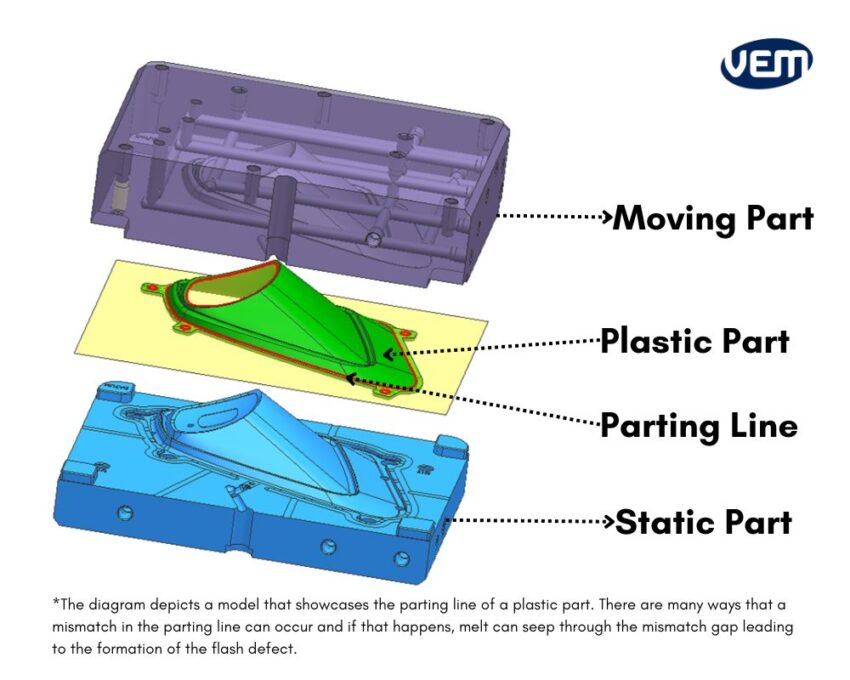
The flash defect usually occurs when the melt is forced out of the mold cavity at the parting line. The parting line is where the two halves or sects of an injection mold separate to release the part from the mold. A flash defect occurs when the two halves are not aligned well, and this causes the melt to escape through the gaps. This can be easily avoided by aligning the two halves of the mold correctly such that there are no gaps for any melt to seep through. You should also note that if the part geometries are more complex, then the mold closure will be even more complicated. The diagram below depicts a model that showcases the parting line of a plastic part:
A parting line mismatch can also occur due to dust, debris and other contaminants. These environmental contaminants restrict the mold from closing correctly or sealing completely which leaks the melt out and this again, leads to the formation of flash defects.
The process of aligning the two halves of the mold correctly, is known as spotting. This process helps to understand if there are any gaps between the two halves of the tool/mold.
Spotting is carried out by applying either a blue or a red ink to one half of the mold and then closing the two halves together. When the ink transfers to the other half of the mold, the tool maker can assess if the alignment is right or if additional mold fitting is required. You can read more about the spotting process here
You should note that vents are a standard feature of the mold design but if they are not correctly designed in the mold, it can introduce mold flashing.
Improper venting has a significant impact on the formation of flash in the injection molded part. If the venting is not correct, air is unable to escape the mold cavity which ultimately, increases the injection mold pressure and forces the melt out of the mold. Thus, trapped air bubbles or compressed air in the mold is a huge design flaw. Correct venting also helps to reduce the injection molding pressure which further helps in the proper closing of the two halves of the mold.
The vents should be designed such that they are not only small such that the melt does not escape but large enough to push the air out. In addition to the vent size, it is also important to consider other parameters such as the number of vents, vent locations and depth of venting. You should also consider cleaning the vents periodically, as that can also introduce the flash defect in your injection molded part.
Sprue bushings in the mold are responsible for transferring the melt into the cavity. They are integral to the tooling and over time, they deteriorate as they are unable to sustain the injection pressure force thus deteriorating in their function. This often leads to the formation of defects, including flash.
Clamping pressure refers to the force that is required to hold the mold closed during the injection molding process. If the clamping pressure is low, the two halves of the mold may not fix well, which can cause a gap in the mold, leading to an injection molding flash. This usually occurs when the side gate is placed near the center of the part and over the hole. In such cases, a higher injection pressure is required for the molding gate which makes it prone to burrs.
On the other hand, if the clamping pressure is greater than the pressure within the mold, the two halves of the mold can be forced apart. Thus, the clamping pressure needs to be precise.
The viscosity of the melt is integral to the injection molding process and is characterized by the property of the liquid to flow freely. Plastics that have a low viscosity can fill the mold very rapidly and they can also flow easily out of the mold which leads to the formation of flow defects.
The viscosity of the melt is dependent upon the temperature, pressure and material properties. In addition, the processing conditions need to be optimal as they can also impact the melt viscosity. Some instances of processing conditions that can alter the viscosity of the plastic are listed below:
In injection molding, the temperature of the barrel and nozzle also impact the viscosity of the melt. Every plastic has a range of melt temperature and if the temperature is higher, then the melt may leak due to lower viscosity thus, increasing the chances of injection molding flash.
Injection molding is a complex and intricate process that poses many restrictions due to the size and geometry of the design. If the mold is overfilled with the melt, the injection pressure will overcome the clamping force which can further lead to melt leakage and the formation of flash defects in your part.
You should also note that cooling shrinks the plastic and this can lead to a short shot in injection molding thus, the feed setting should be adjusted such that mold is not over-filled but the part also, isn’t incomplete.
Higher pressure than what is optimal influences the temperature and the viscosity of the melt to increase it and this can lead to various defects including mold flashing.
When molds have narrow fields, a small amount of melt can solidify in these areas and they then block the flow of the plastic. This creates a localized pressure within the mold which gives rise to not only mold flashing but various other issues as well such as plastic warpage and non-uniform density.
If mold flashing occurs in a specific area, it’s preferable to fix the mold, especially if it’s a new mold. However; if the molds are worn out or older, then there are various solutions that can be incorporated to remove the flash from the part. These solutions are also applicable if it’s a low-quantity production run or if the injection molder does not have time to fix the mold. Let’s take a look at some of these approaches:
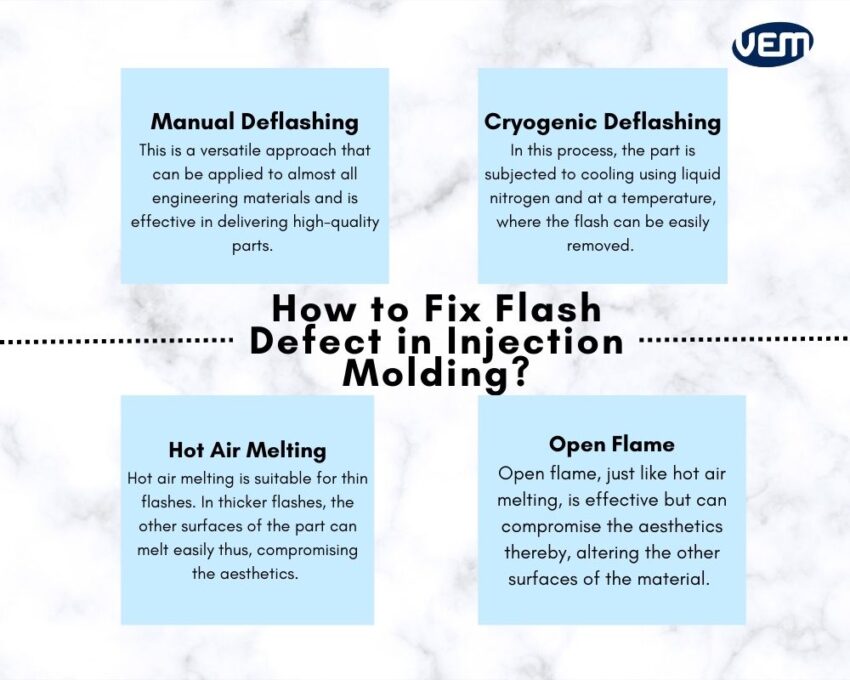
Manual deflashing is a versatile approach that can be applied to almost all engineering materials. It is one of the most effective approaches that can deliver high quality parts. In this process, the flash is manually cut with the help of scissors, knives, and grinders along the parting line of the final product.
You can also consider fixing mold flashing via cryogenic deflashing. It is an effective approach that does not affect the finish of the parts. In this process, the part is subjected to cooling using liquid nitrogen and at a temperature, where the flash can be easily removed. Though this process is effective, it is not very cost-effective as cryogenic deflashing machines are expensive.
If the flash defect occurs in your injection molded part, you can melt the flash using hot air. However, this approach is not suitable for thicker flashes as it can easily melt the other surfaces of the part and compromise its aesthetics. This process is suitable only for thin flashes.
You can also use an open flame for deflashing but just like hot air melting, this method can also compromise the aesthetics thereby, altering the other surfaces of the material.
Injection molding flash is a result of various reasons and it takes skill and knowledge to avoid the same! Flash-free molds are definitely an option but they come with added costs and should thus, be reserved for sensitive applications. It is viable to keep mold flashing at bay with the correct mold design and optimized processes. The VEM Tooling team has the expertise and experience to help you with these technicalities!
Contact the VEM Tooling team to understand how to reduce the occurrence of injection molding defects and achieve a seamless manufacturing process.